Note: The ability to create/edit sessions in a Conferences i/o app will require the multi-session level of service. If an app doesn't have administration choices for Manage Sessions or Manage Presenters, this usually it is a single-session app, which only supports use for one meeting or session at a time. Contact your account manager or reach us at hello@conferences.io to talk about upgrading.
TABLE OF CONTENTS
- Attendance Tracking Configurations in Sessions
- Note about Streamlined Self Reporting Use
- Note about Kiosk Mode
- Fields of Study
Attendance Tracking Configurations in Sessions
When Attendance Tracking is enabled for an app, new fields and settings are available when Creating or Editing Sessions.
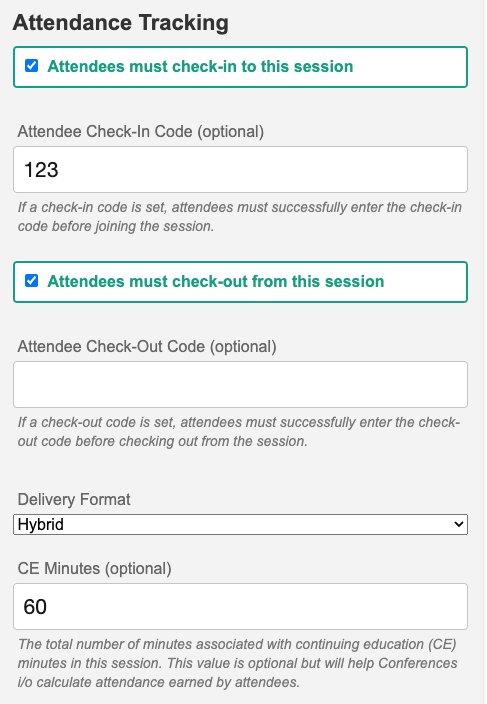
Attendees must check-in to this session: When checked, users will be prompted to enter their attendee identification information as soon as they join the session. A timestamp is captured when they check-in.
Attendee Check-In Code: When specified, attendees will be required to enter this code successfully before they can join the session. This code is not case sensitive (the user can enter it as lowercase or uppercase).
Attendees must check-out from this session: When checked, users will see a button at the top of the screen labeled "Check-Out". When an attendee clicks this button, they will be asked to confirm that they truly want to check out. This action will be timestamped in the system and available in the reporting. Also, if check-out is used, the report will include a calculated value for "Total Time Spent" and "% of Total Time Spent" in the report output. This can be handy if it's important to know if the attendee stayed for a majority of the session.
Attendee Check-Out Code: When specified, attendees will be required to enter this code successfully before they can check out of the session. This code is not case sensitive (the user can enter it as lowercase or uppercase).
Delivery Format: Specifies the method of delivery for the session, either In-Person, Virtual, or Hybrid. If hybrid is used, attendees will be prompted to select their specific method on check-in.
CE Minutes: When specified, this value is used to help calculate attendance earned by attendees for continuing education credits.
Note about Streamlined Self Reporting Use
When using the streamlined self reporting mode, it is not necessary to select Attendees must check-in. All sessions, regardless of the field settings listed above, will appear when users click to add a session via the streamlined mode. A check-in code can be used, and if set users will be prompted to enter that code when adding a session that they've attended.
Note about Kiosk Mode
When using the Kiosk mode (e.g., a tablet or laptop in the room for users to quickly check into a specific session), it is not necessary to configure attendance tracking fields listed above. Also, any check-in code that might be entered for a session will be ignored for Kiosk mode. In other words, users will not have to enter a check-in/out code with Kiosk mode, even if they are specified within the session setting fields.
Fields of Study
You can optionally specify up to 7 different 'Fields of Study' along with the number of CE credits that a user will earn from attending the session. This information will appear on the certificate generated for attendees.